If you have to create a bootable USB media to perform a clean installation or an in-place upgrade of Windows 11, you usually have to use the Microsoft Media Creation Tool. Although the tool works as expected to download the ISO file or create an installation media, you can always choose third-party tools, which sometimes offer even more customization options.
On the internet, you may find different third-party tools. However, when it comes to the best alternatives for the Media Creation Tool, there are only two applications that stand out, including Rufus and Ventoy.
And what do these two apps have in common? They both make it easier to install Windows 11 on supported as well as on unsupported hardware.
In this how-to guide, I’ll help you choose and get started using these applications to create a USB bootable media for Windows 11.
Important: Although these apps work as advertised, they’re third-party apps that are not supported by Microsoft. As such, use them at your own risk. Also, it’s critical that you back up any files, as these instructions will erase everything on the USB flash drive.
How to create a Windows 11 bootable USB with Rufus
Rufus is one of the most popular free and open-source utilities, and it’s perhaps the best alternative to the Media Creation Tool, at least by tech-savvy users and network administrators.
The tool can help you format and create a bootable USB flash drive for Windows 11 (and 10). In addition, Rufus offers two features that stand out from other apps, including the ability to download the operating system installation files directly from the tool, and provides options to customize the flash drive.
Some of these options include the ability to bypass the hardware requirements, such as TPM 2.0 and RAM, and you can select the option to create a local account, bypassing the network connection and online account requirements.
Create a Windows 11 bootable USB with Rufus
To create a bootable media for Windows 11 with Rufus, connect a USB flash drive of at least 8GB, and use these steps:
- Open the Rufus page.
- Click on the latest release Zip file available under the “Download” section.
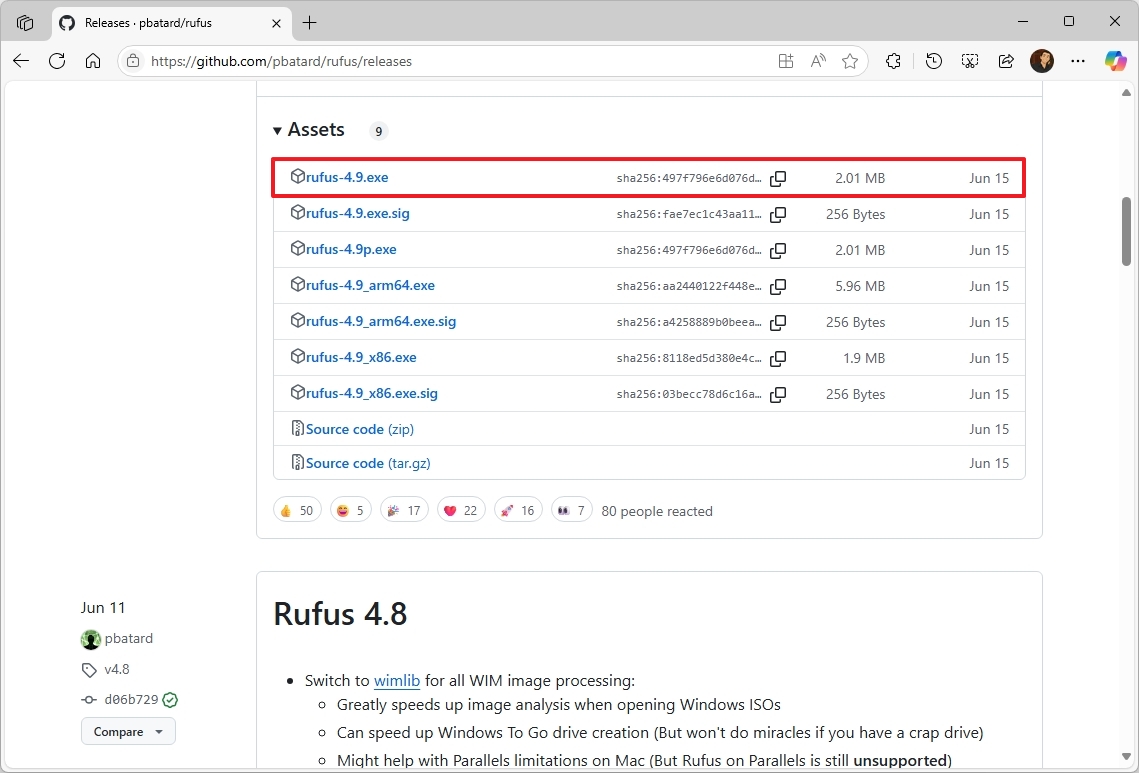
- Save the tool on your computer.
- Double-click the Rufus tool to launch it.
- Quick tip: If you receive an option to check for updates, click the “Yes” button, which will enable the option to download the ISO file from the cloud.
- (Optional) Choose the USB flash drive under the “Device” section.
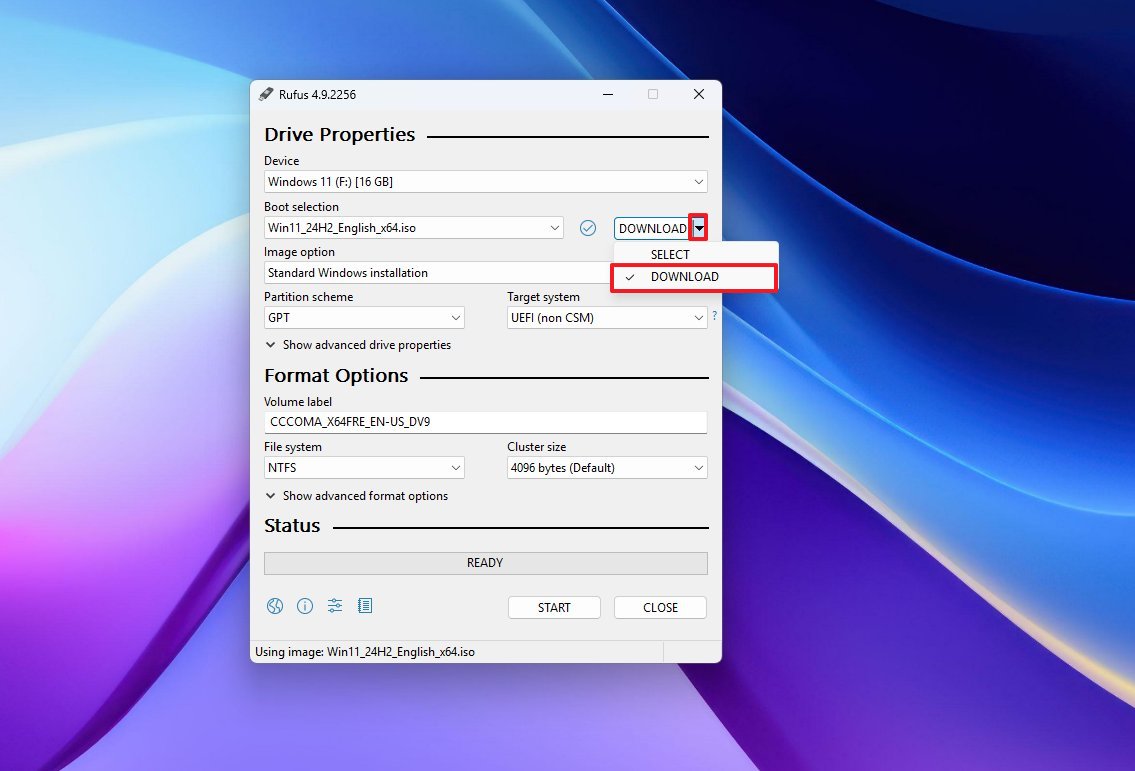
- Click the down-arrow button (on the right side) and select the Download option.
- Quick tip: If you already have the ISO file, you can choose the “Select” button to open it, rather than downloading it again.
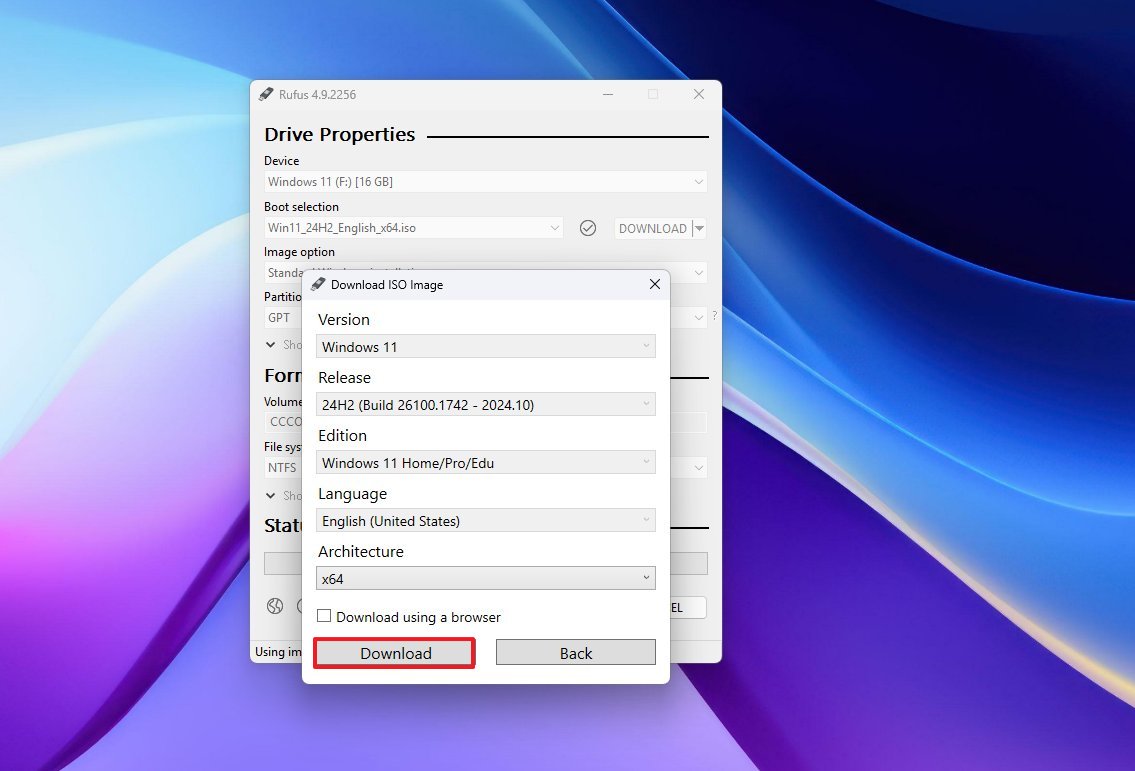
- Click the Download button.
- Select the Windows 11 option.
- Click the Continue button.
- Select the latest version available for the operating system.
- Click the Continue button.
- Select the Windows 11 Home/Pro/Edu option.
- Click the Continue button.
- Select the language for the installation.
- Click the Continue button.
- Select the x64 architecture option (or the ARM64, if you have a Windows on Arm PC).
- Click the Download button.
- Select the location where you want to save the Windows 11 ISO file.
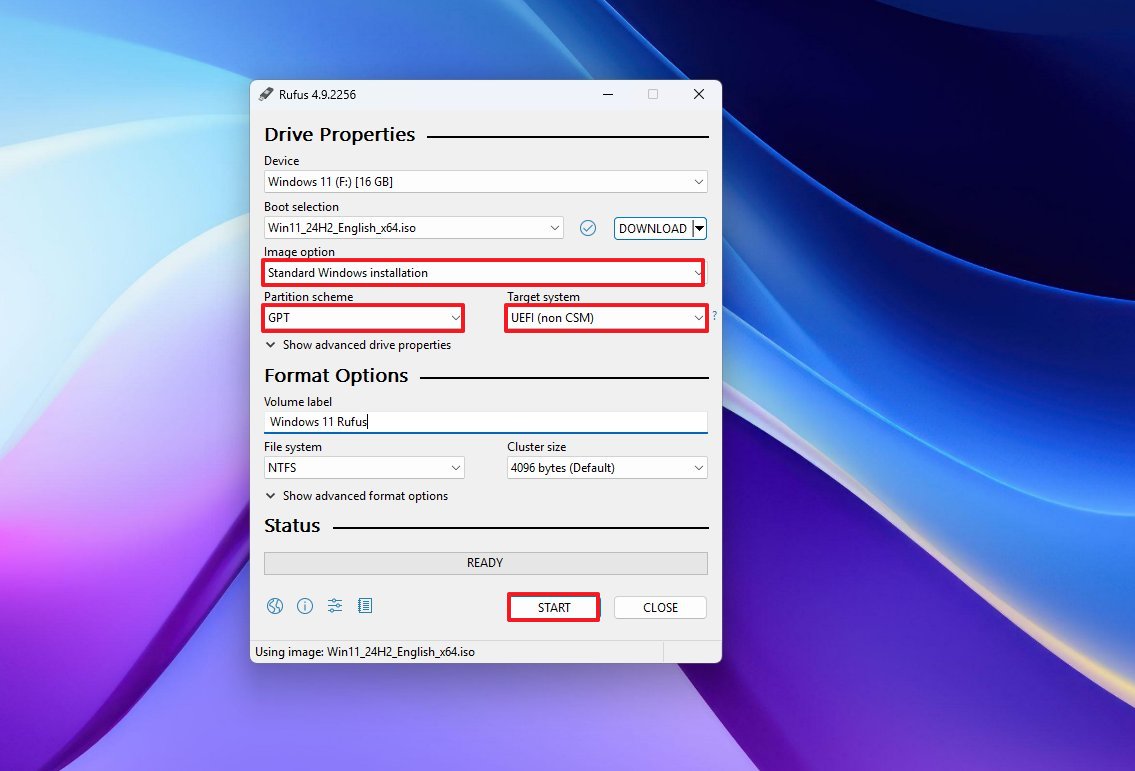
- Choose the “Standard Windows 11 Installation” option under the “Image option” setting.
- Select the GPT option for the “Partition Scheme” setting.
- Choose the UEFI (non CSM) option for the “Target system” setting.
- (Optional) Continue with the default settings.
- (Optional) Confirm a name for the drive under the “Volume label” setting.
- Click the Start button.
- (Option 1) Clear all the options from the “Windows User Experience” page to create an installation media for supported hardware.
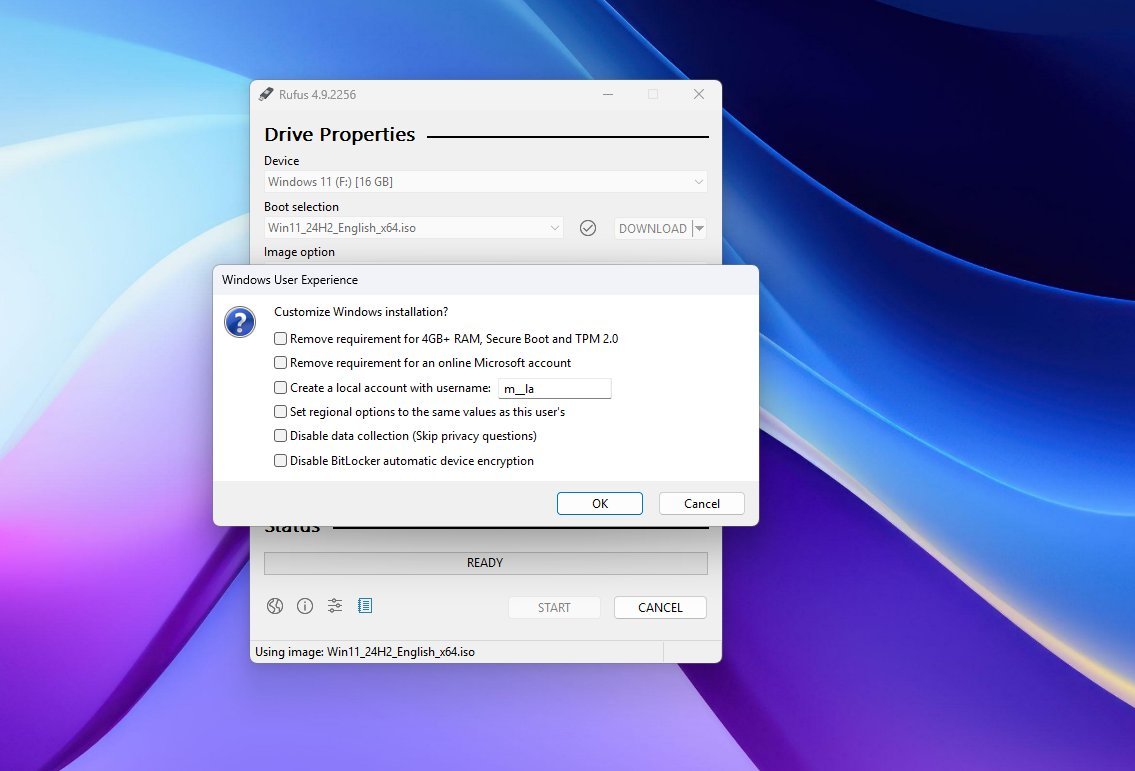
- (Option 2) Check the “Remove requirements for 4GB+ RAM, Secure Boot and TPM 2.0” option to bypass the hardware requirements.
- (Option 3) Select the “Remove requirement for an online Microsoft account” option to bypass the internet and online account requirements.
- Click the OK button.
After you complete the steps, the Rufus tool will create a custom USB flash drive to install the operating system.
How to create a Windows 11 bootable USB with Ventoy
Ventoy is another excellent alternative to the Media Creation Tool. However, this open-source utility operates differently.
The tool doesn’t create installation media. Instead, it installs on the USB flash drive to make it bootable, then you have to add the ISO file of virtually any operating system, such as Windows 11, 10, or Linux.
Once you’ve added all the ISO files, you can start the computer with the Ventoy software. Then, you’ll have the option to select the Windows 11 ISO file from the boot menu provided by Ventoy, and the Windows Setup will begin.
The best part about Ventoy is that it automatically applies settings to bypass system requirements if it detects that the hardware isn’t compatible with the operating system.
Create a Windows 11 bootable USB with Ventoy
To create a bootable media for Windows 11 using Ventoy, connect a USB flash drive of 8GB or more, and use these steps:
- Open the Ventoy page.
- Click on the latest release Zip file under the “Download” section.
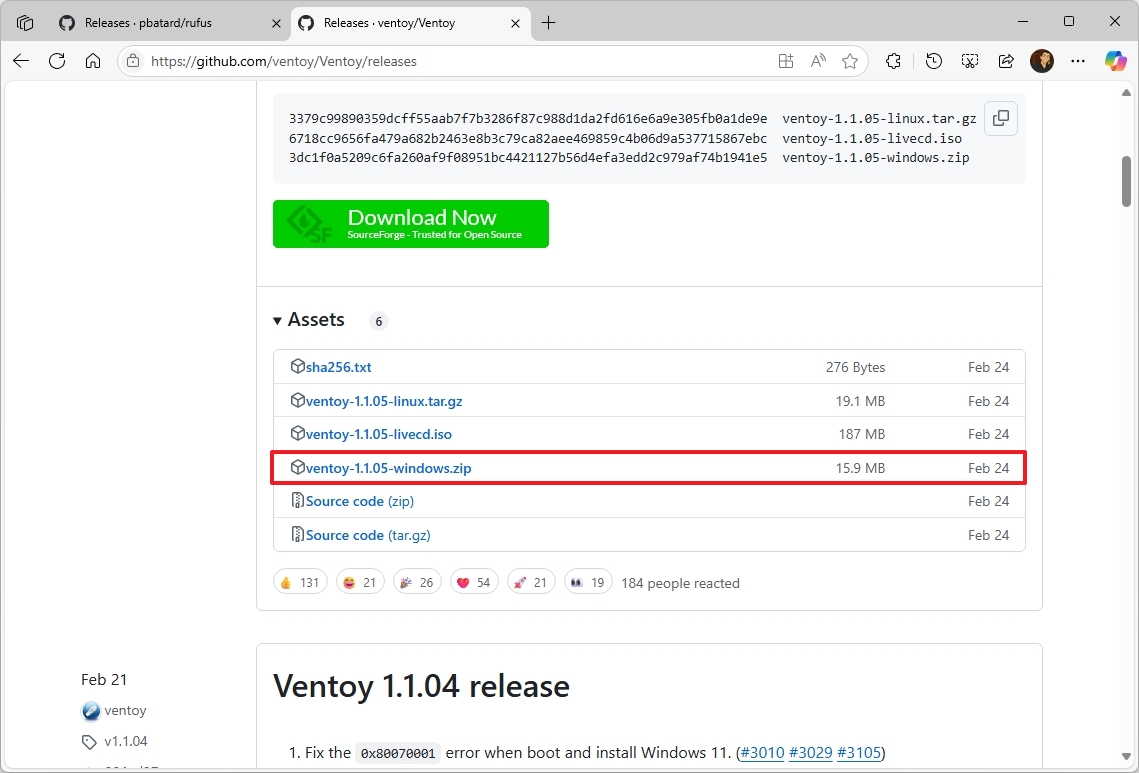
- Save the tool on your computer.
- Quick note: The browser may flag this download, but it’s a popular tool.
- Open File Explorer.
- Open the Zip folder location.
- Select the ventoy-x.x.xx-windows.zip file and click the Extract all button from the command bar.
- Click the Browse button.
- Select a location to extract the files.
- Click the Select Folder button.
- Click the Extract button.
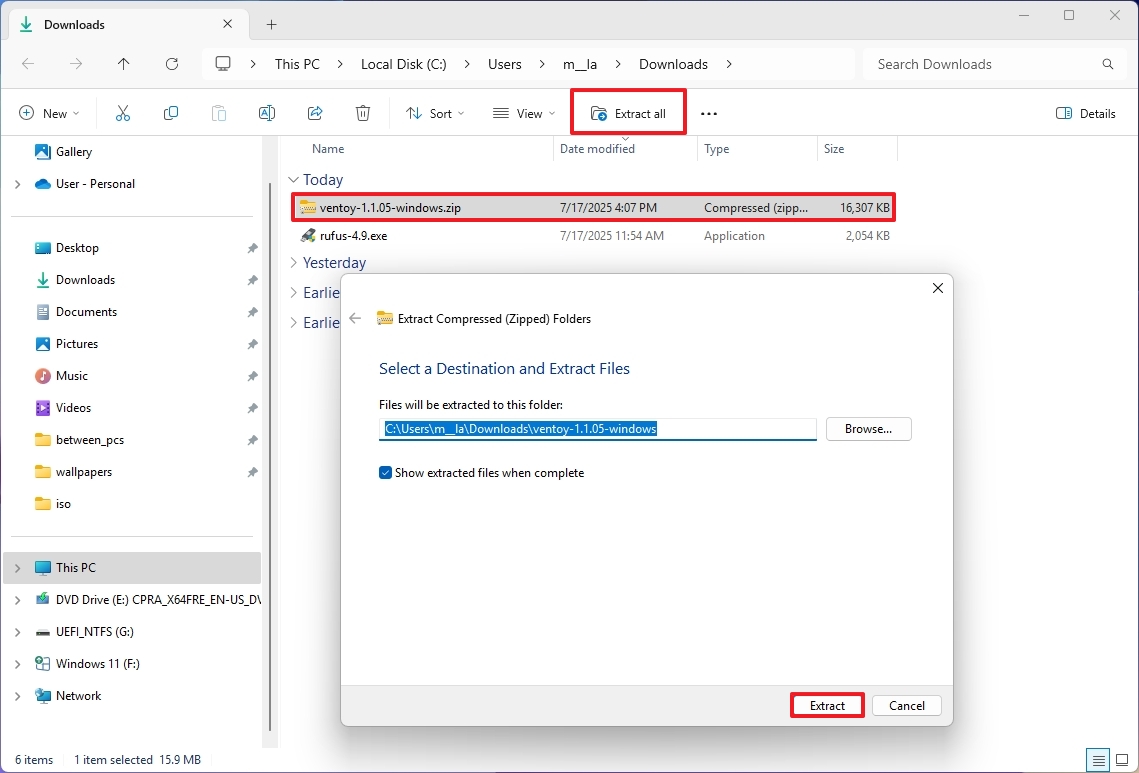
- Open the ventoy-x.x.xx folder.
- Right-click the Ventoy2Disk.exe file and choose the Open option.
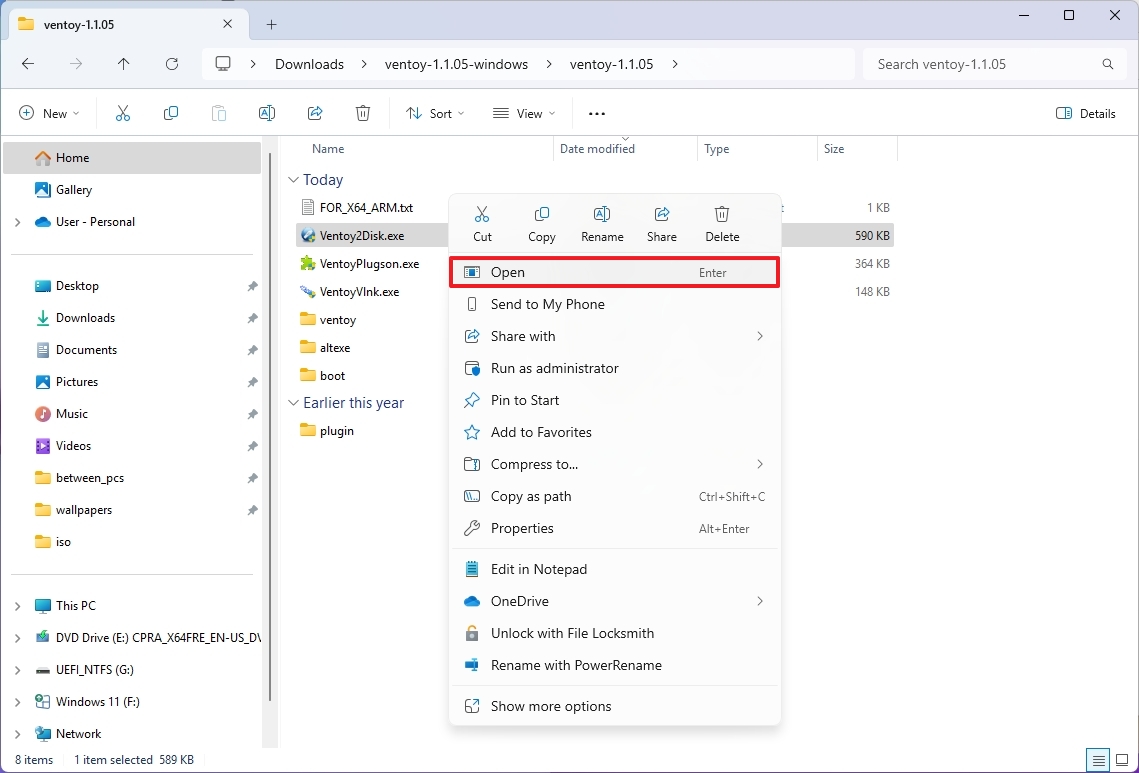
- Select the flash drive from the “Device” setting.
- Click the Install button.
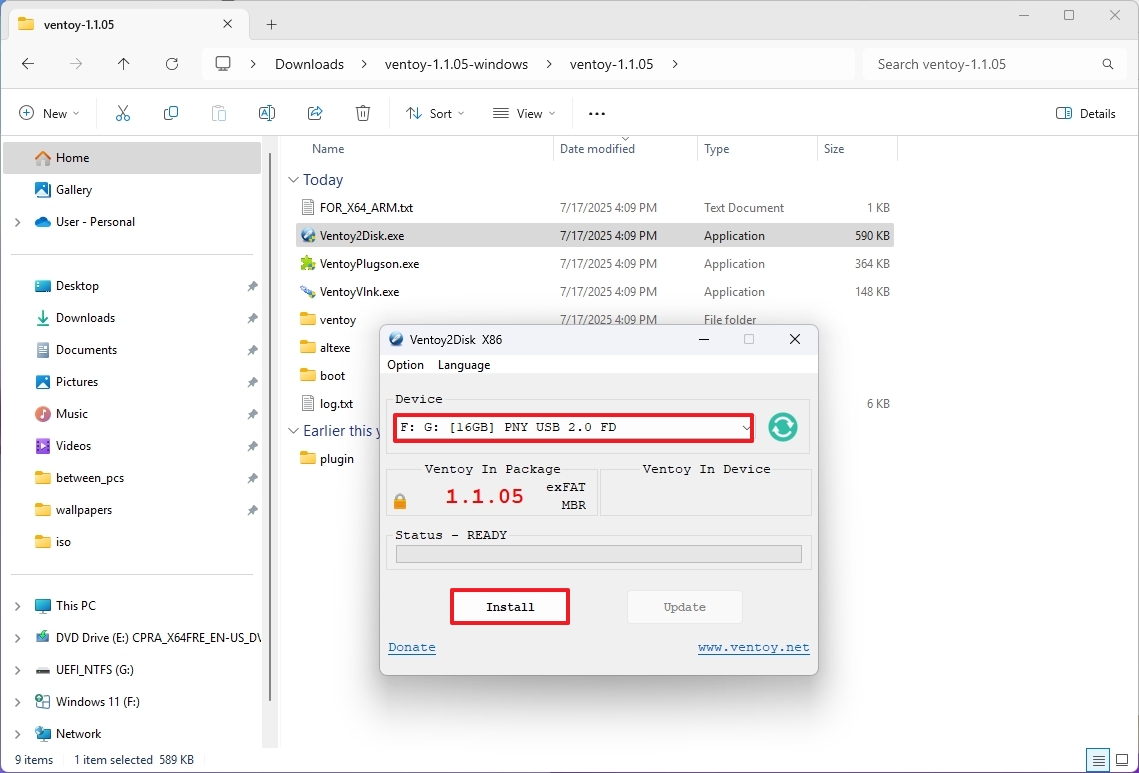
- Click the OK button.
- Click the Yes button.
- Click the Yes button (one more time).
- Click the OK button.
- Click on This PC from the left pane.
- Open the Ventoy drive.
- Open the Microsoft Support website.
- Quick note: If you already have the ISO file, you can skip to step 24.
- Select the Windows 11 option under the “Download Windows 11 Disk Image (ISO)” section.
- Click the Confirm button.
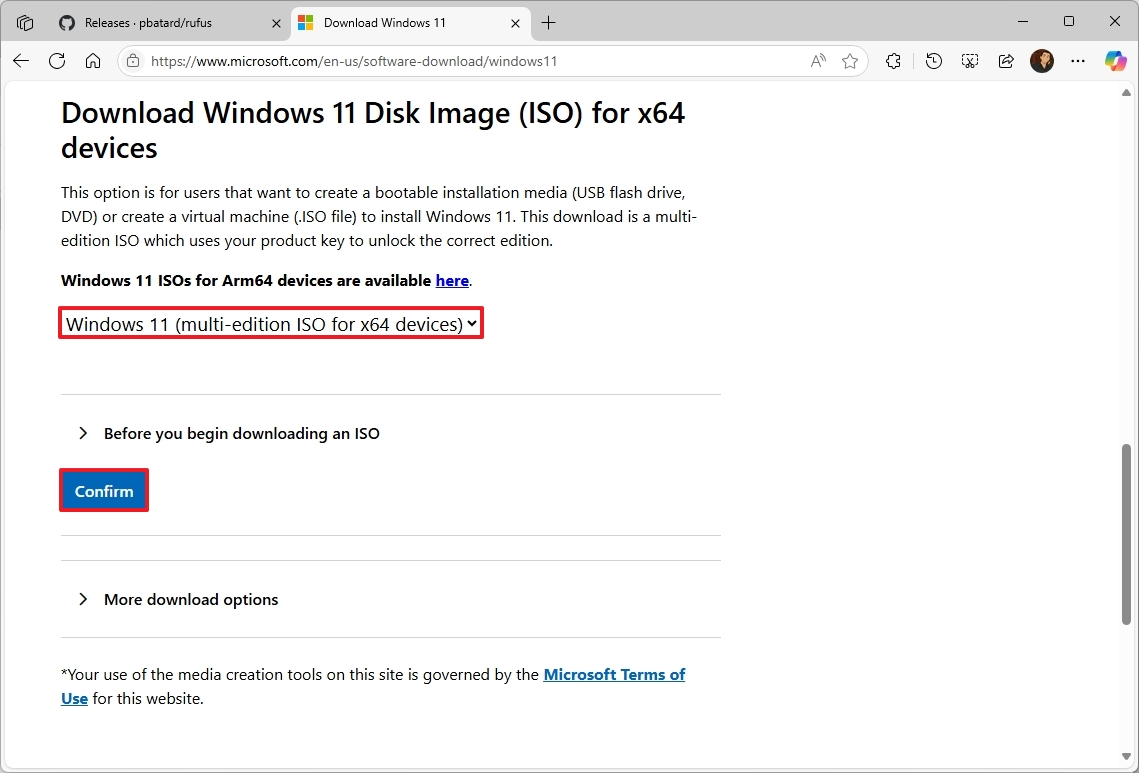
- Select the installation language.
- Click the Confirm button.
- Click the Download button.
- Copy and paste the ISO file into the USB flash drive.
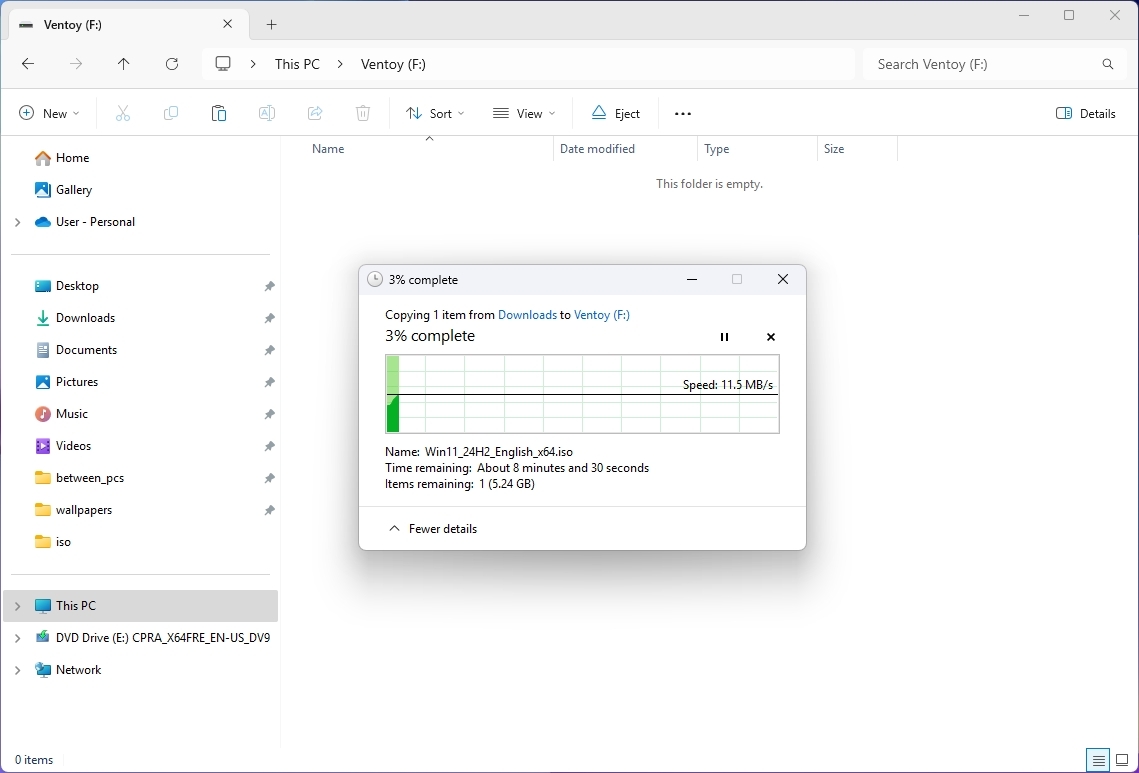
Once you complete the steps, Ventoy will make any ISO file on the flash drive bootable.
What are the differences between Rufus and Ventoy?
One big difference between these tools is that you can use a USB flash drive created with Rufus to perform a clean installation or an in-place upgrade from the desktop environment, while the media created with Ventoy only allows you to boot the device to launch a specific setup.
Additionally, the Rufus tool features a download option for the ISO file, whereas Ventoy requires you to provide the image file.
However, Ventoy remains a more straightforward tool, allowing you to drop as many ISO files as the available space on the USB flash drive.
If this is a one-time case, you may find the Rufus tool more suitable. However, if you find yourself reformatting the drive frequently to install different versions of the operating system, then Ventoy allows you to start the computer using multiple ISO files.
Have you tried Rufus or Ventoy to install Windows 11? Which one worked better for you? Let me know in the comments.
More resources
Explore more in-depth how-to guides, troubleshooting advice, and essential tips to get the most out of Windows 11 and 10. Start browsing here:
Source link

